 Timberline Homestead A self sufficient homesteading life
Up to this point we’ve shared some of the nitty gritty demolition pictures of various parts of the house. This is chronicling the remodel of the kitchen from start to finish.
Before the demolition began.
(As mentioned in a previous post these pictures were taken before we closed but after we did some cleaning to spruce it up so the lender would be so kind to finance our house. )


Both showing the general state of the room. Dirty, dingey, old…Nothing horrendous. Picture 2 shows the door that leads to the pantry straight off of the kitchen and the mudroom which is on the right.

This picture shows the built in microwave cubby. Also, the door on the left is a closet and the open door is the bathroom.

Showing the dining area.

Here is a long shot of the dining area that leads into the living area. The door shown leads to the office.
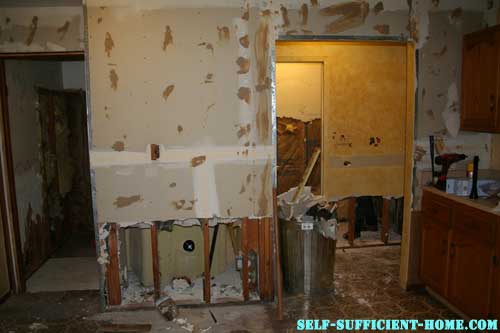
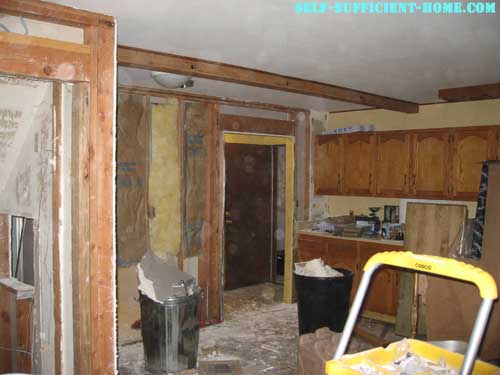
Let the Demo Begin!!


Tore the paneling down leaving the drywall. Picture 2 shows a few areas in the kitchen, pantry (on the right), and bathroom (on the left) where drywall touching the floor was removed due to black mold.


On second thought, take the drywall too! Our drywall guy said the work involved in patching all the spots where the glue had ripped the paper off of the unfinished drywall when we pulled the paneling off would have been more time consuming (and costly) than tearing it all down and starting fresh. This was the messy part. Cleaning the drywall dust up took multiple hits with the mop and broom.
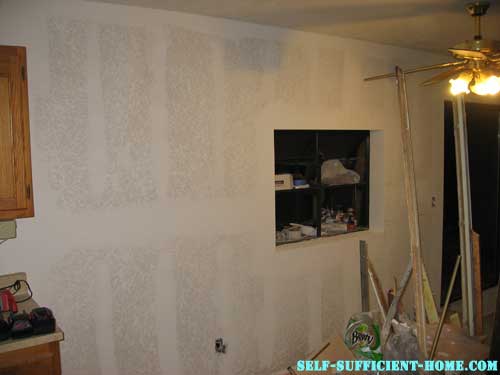
Sweet Progress


At this point the new drywall was up and textured ready to be primed and painted. The paneling on the overhead beam was removed.

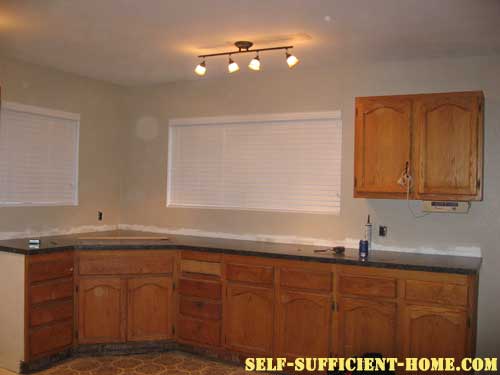
A little, ok a lot, of elbow grease to clean up the oak cabinets. They were in good condition under all of that grime. Nothing a little time and new handles couldn’t fix.
Lots of Primer and Paint


After many hours the walls and ceiling were primed and painted. New counters were almost complete at this point minus the back splash. New light fixtures were up and a portion of the drawer and cabinet pulls were installed. Window blinds were also installed.

Showing the new ceiling fan and although cluttered, finished counters. Also, a bouncy dog for your enjoyment.

After pulling all the nails the beam was sanded and ready to be stained.
And finally it’s move-in ready

We went with a granite composite sink for a few reasons. 1. It’s durable 2. It wont shatter glass as easily as cast iron 3. It’s solid all the way through so the finish will never wear or scratch. 4. It wont stain

The new propane stove installed. Also, the beam has been finished.
You’ll notice throughout the downstairs that the original flooring still remains. We will tackle that at a later time.
Hey,
What brand is your composite sink? I had one just like that and loved it. I can’t seem to find another one. I’ve found other brands that I am not happy with the reviews I found online. Thank you!